Calligraphy vs. Lettering—why it matters?

Last post we explored the difference between calligraphy and a font. Today we are talking about what makes calligraphy different than hand lettering or faux lettering.

Now the definitions I am going to use may vary between the people you ask. These are MY understanding of them and MY definitions that I have learned through my own studies.

What is the difference between calligraphy and lettering?

Calligraphy

As a refresher, Calligraphy is the art form of writing beautiful or decorative letters with a specialized tool such as a pointed pen or brush. It is different from handwriting or cursive due to the beautiful heavy down strokes and the light up strokes. Unlike handwriting or cursive, calligraphy is created through strokes that make up the letters verses the fluid, one line of handwriting or cursive.

Lettering

Lettering, though similar to calligraphy, is the art of drawing letter forms. Unlike calligraphy, lettering you can create using any tool such as pencil, marker, brush or pen.

Like calligraphy there are many varieties of hand lettering. Think about back in grade school when you would use bubble letters for notes or posters. This is a style of lettering. Lettering can be cursive letters or printed letters that mimic fonts or handwriting.

Faux Lettering

Then what is faux calligraphy? This style of lettering falls in both the camps of calligraphy and hand lettering. Your goal is to create letters that look like calligraphy but using a different tool like a marker or pen. You are using strokes like calligraphy to make your letters, but going back in filling in the downstrokes, like hand lettering, to make your letters look more calligraphy like.

Like the chalkboard above, these are beautiful calligraphy letters created with a chalk marker. I went back in and filled in the downstrokes to give the calligraphy style but with a simple marker.

To recap:

Calligraphy - strokes to create letterforms with specialized tools.
Handlettering - drawing letter forms and using any tool to do so.
Faux Lettering - Using tools and style of hand lettering to create the look of Calligraphy style letters.

All three art forms area beautiful option for anyone of your parties, cards and posters. What are you going to use next?

Wise Wedding: Invite Mistakes to Avoid

Today’s Wise Wedding advice is going to be simple and to the point. Weddings can be expensive, and people often don’t fully understand everything that goes into planning a wedding. This can include not understanding how many people a reception hall allows, RSVPing in a timely manner, and frankly who you actually want to be there on your day.

WiseWedding_Invite Mistakes to Avoid.jpg

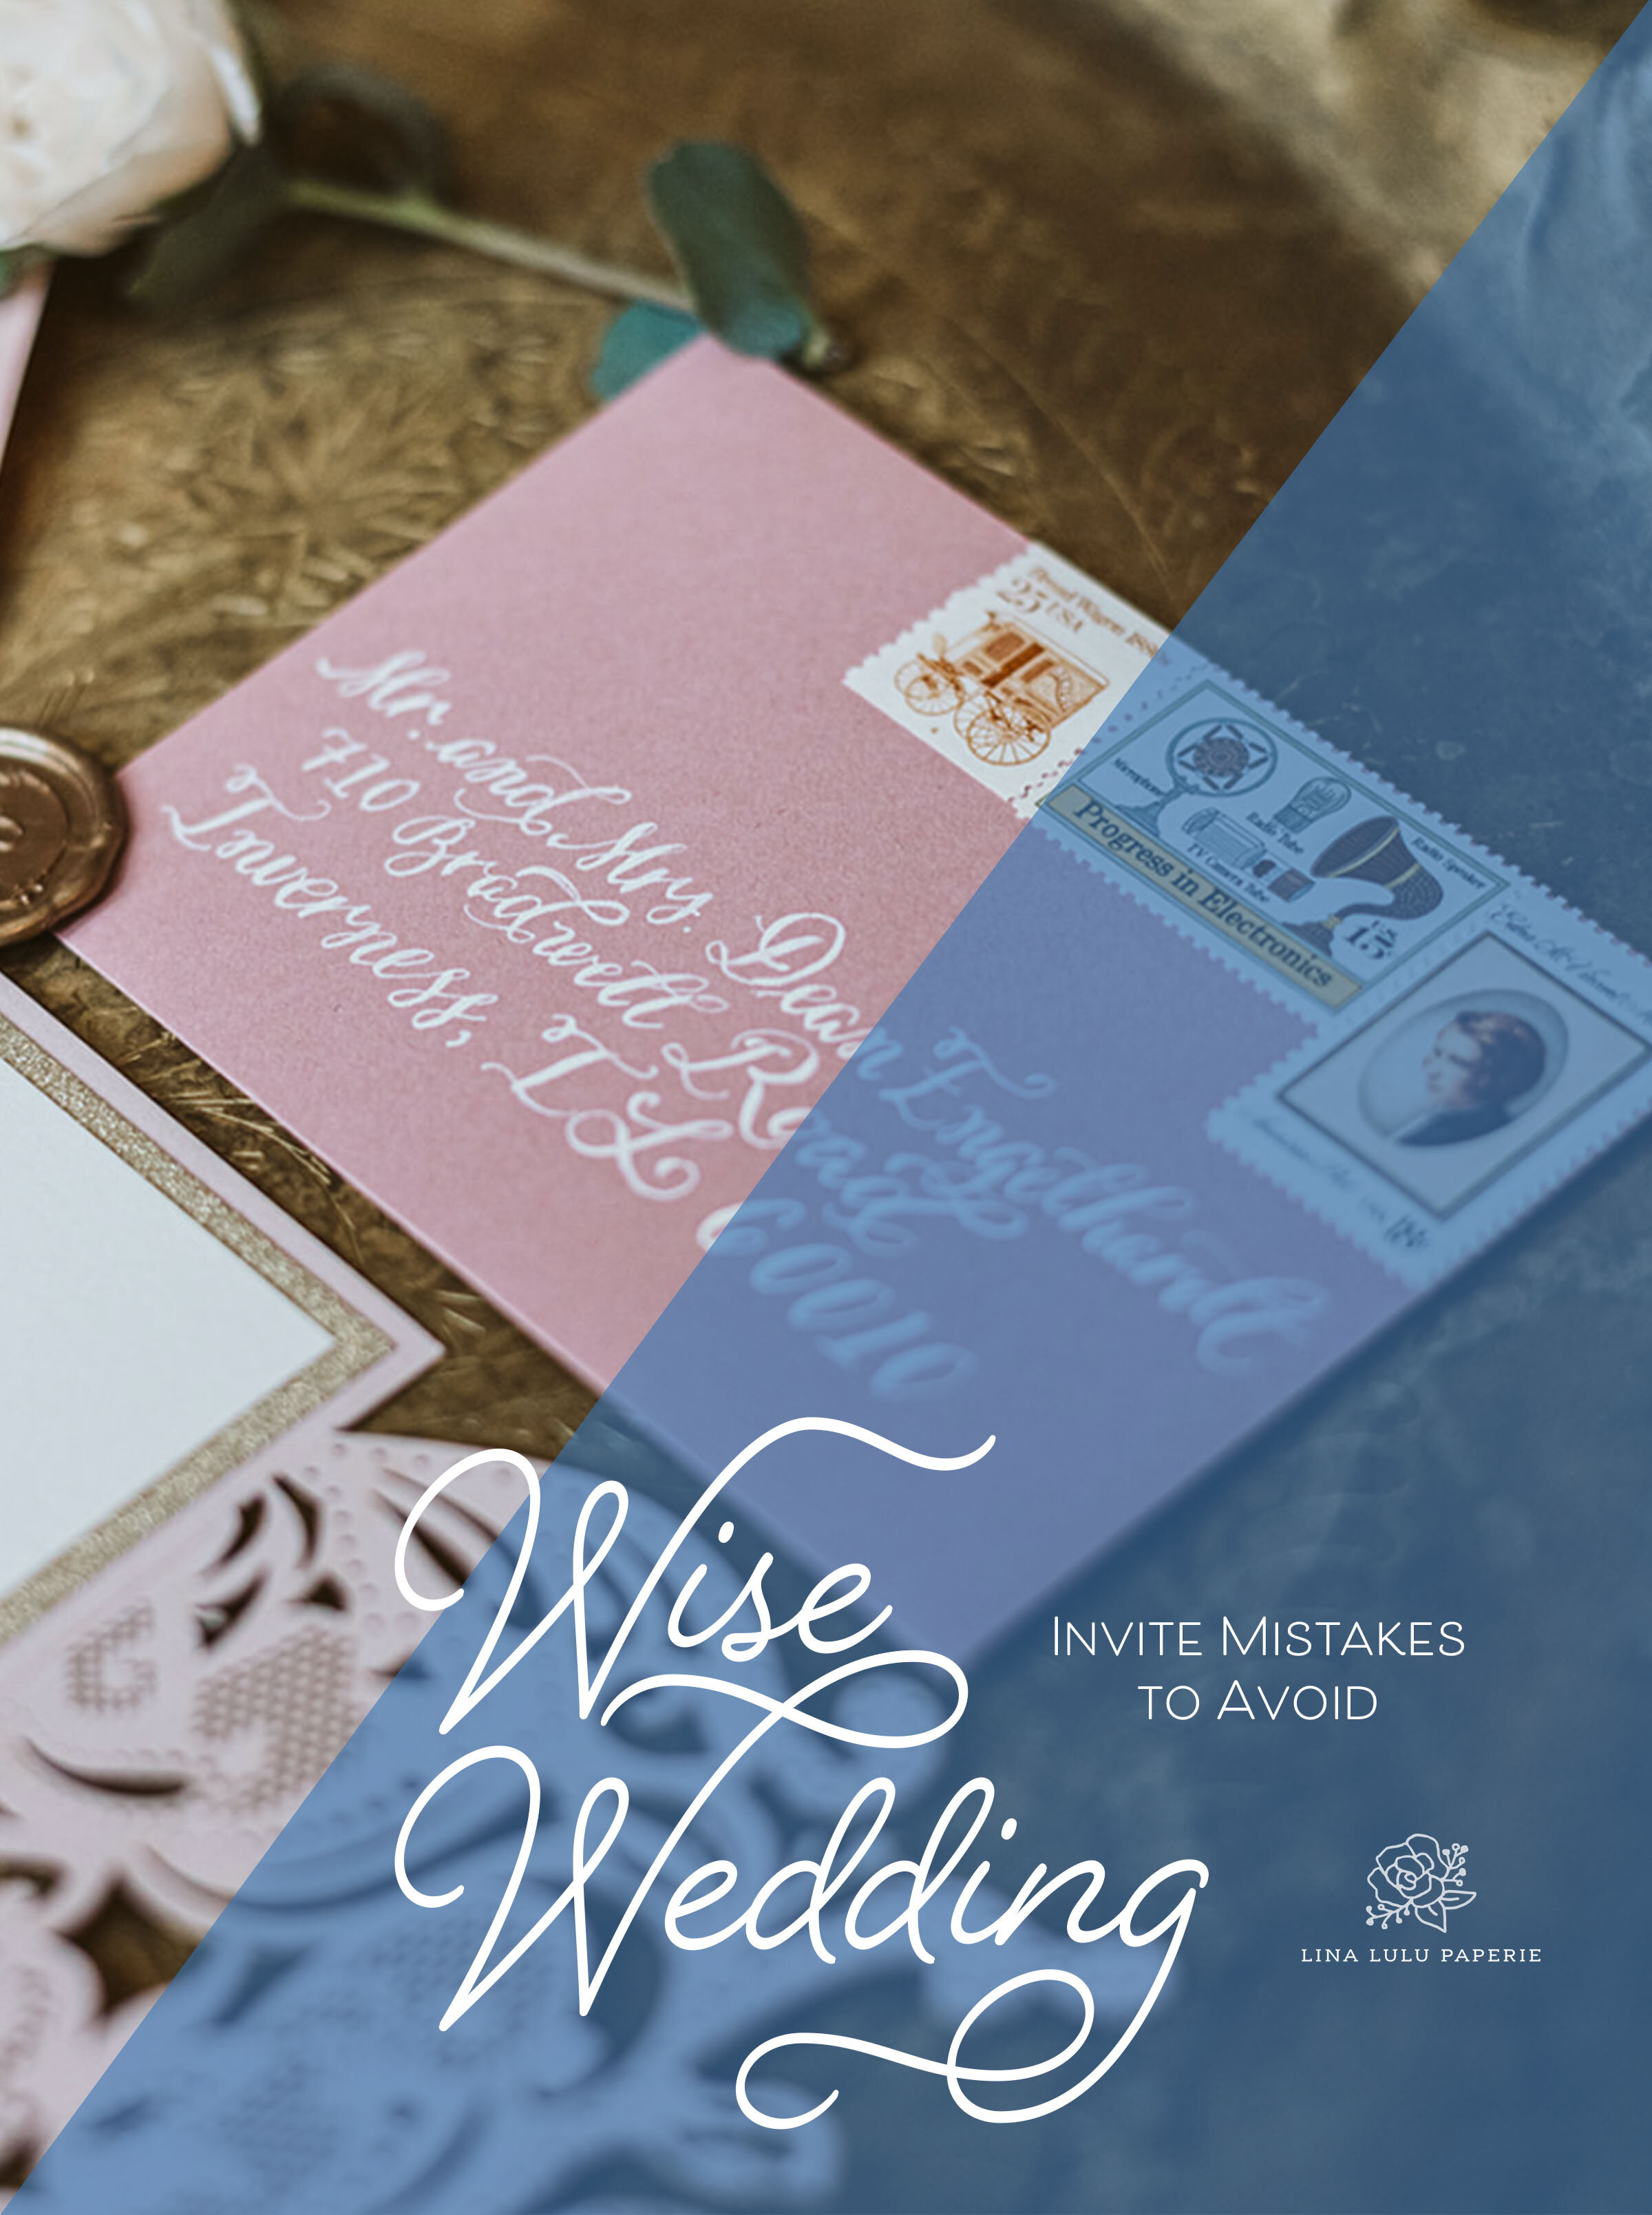
1. Mistake: Not Clarifying Who is Invited

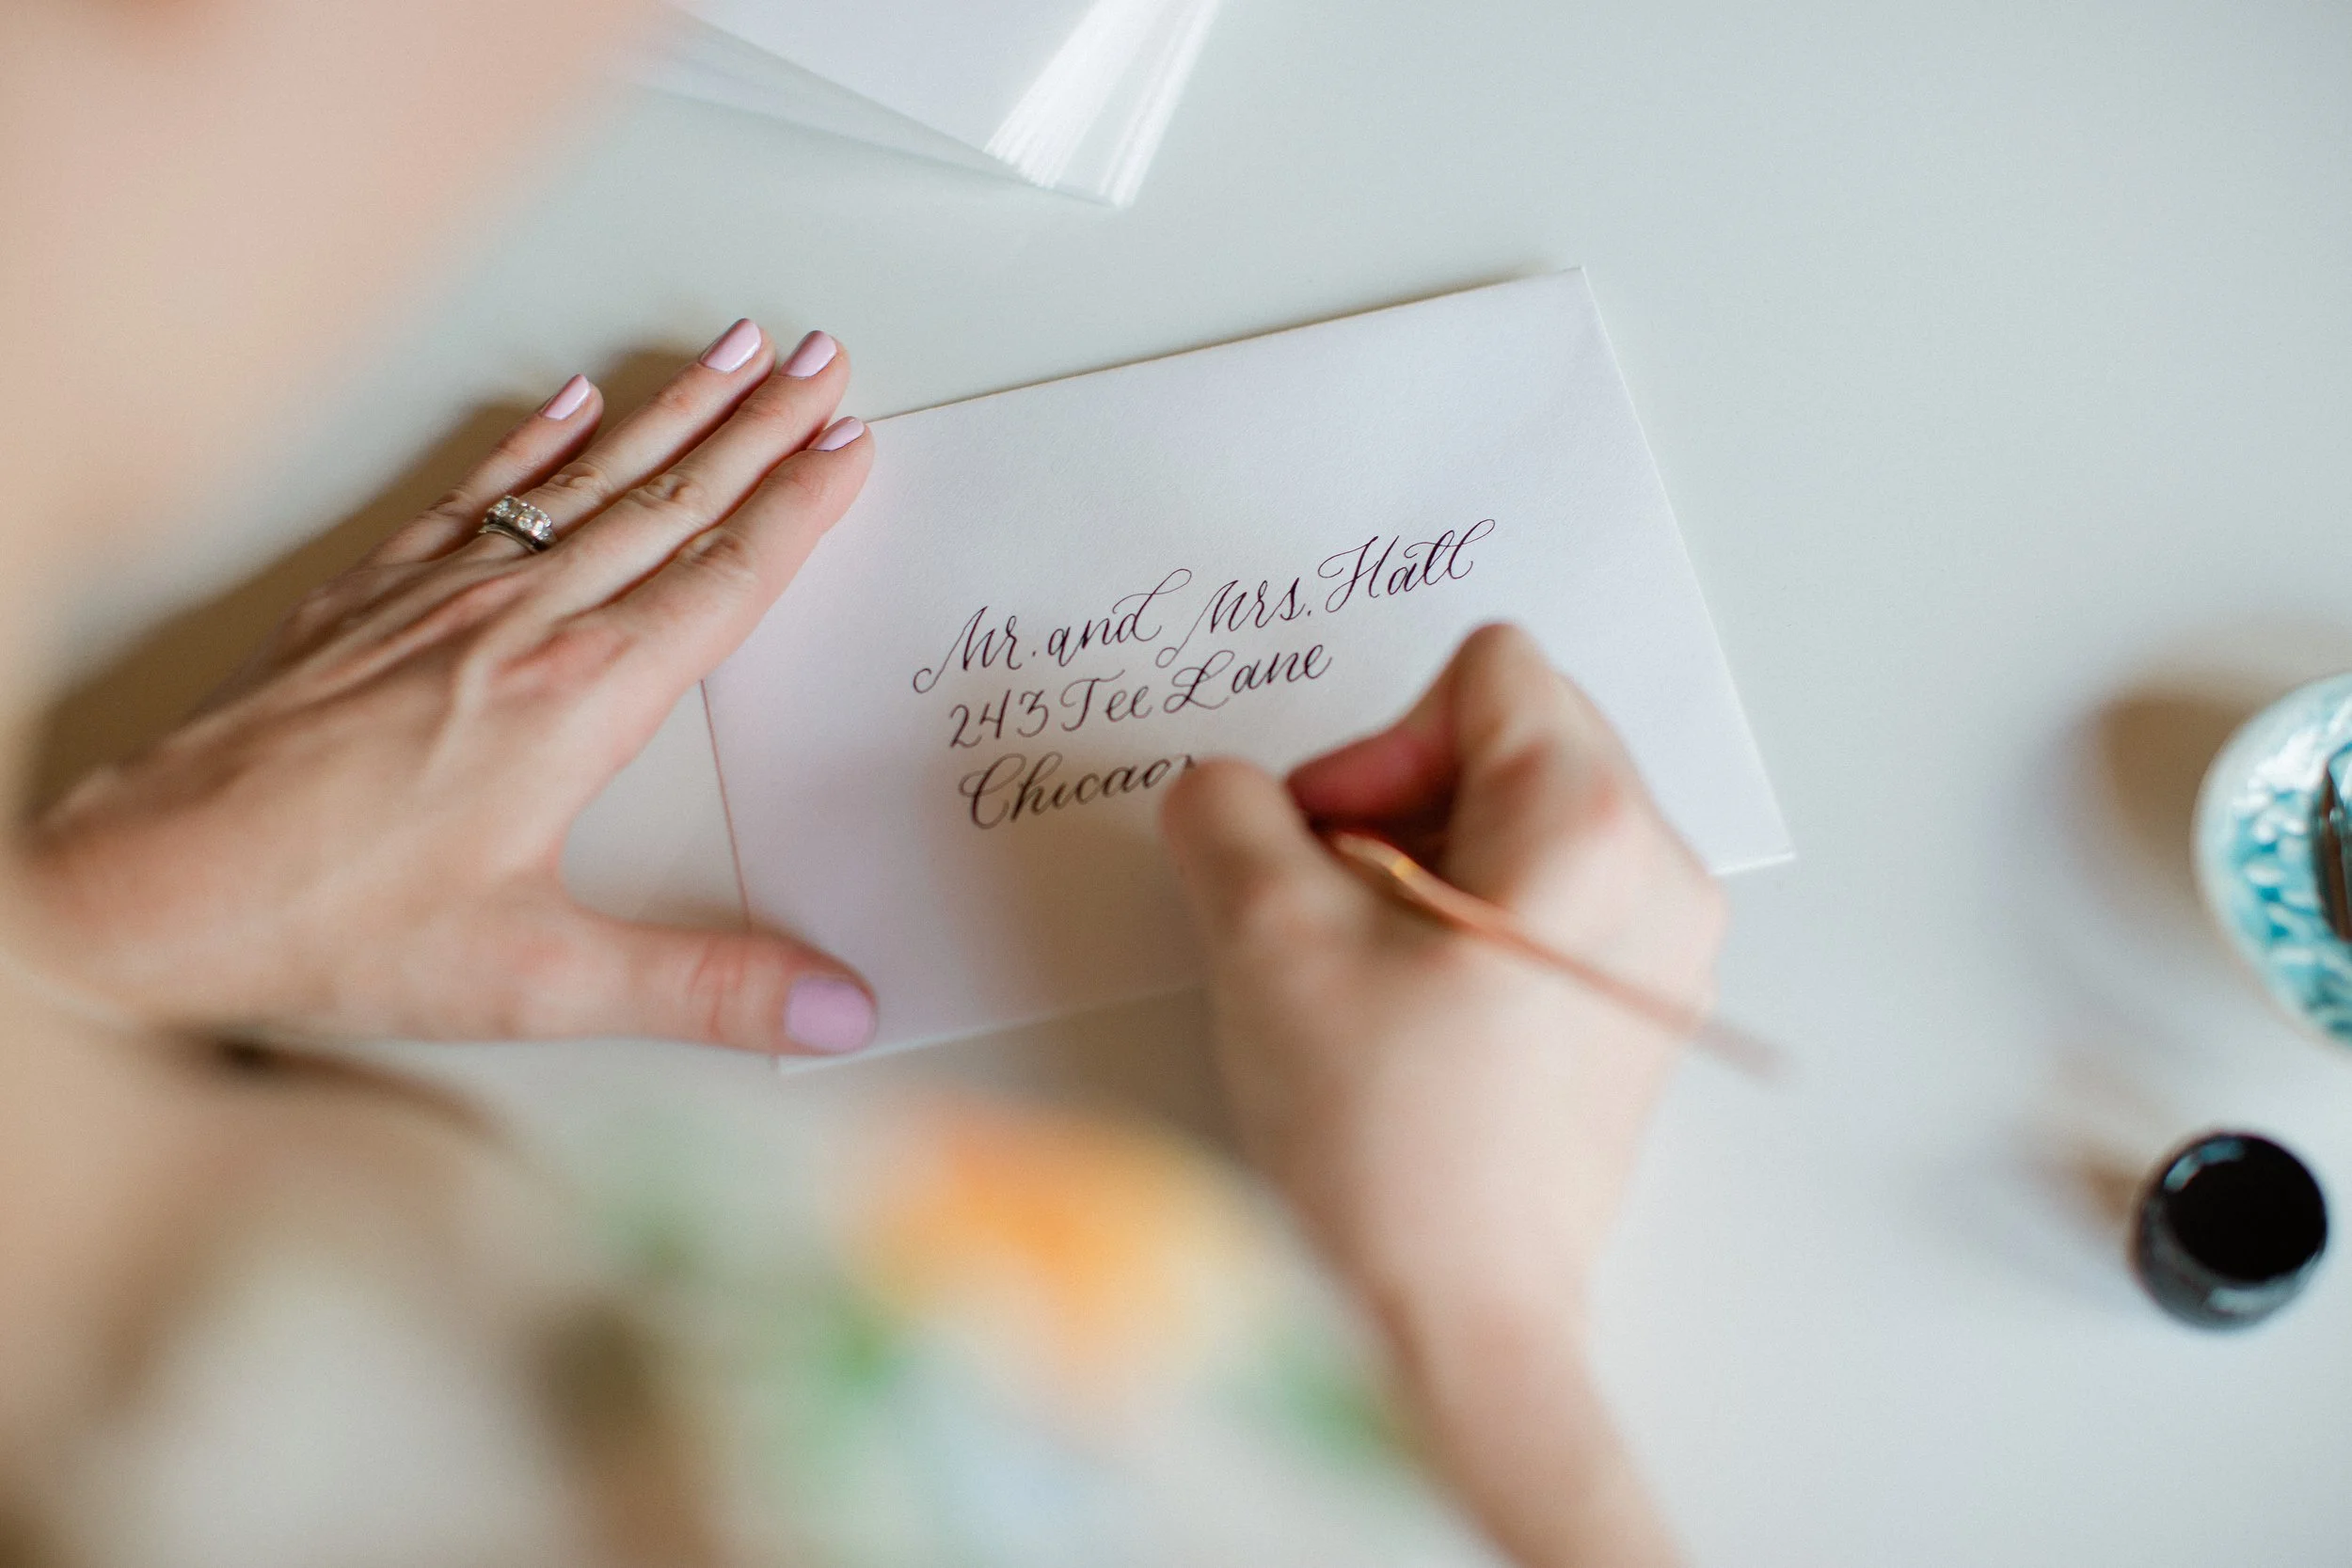
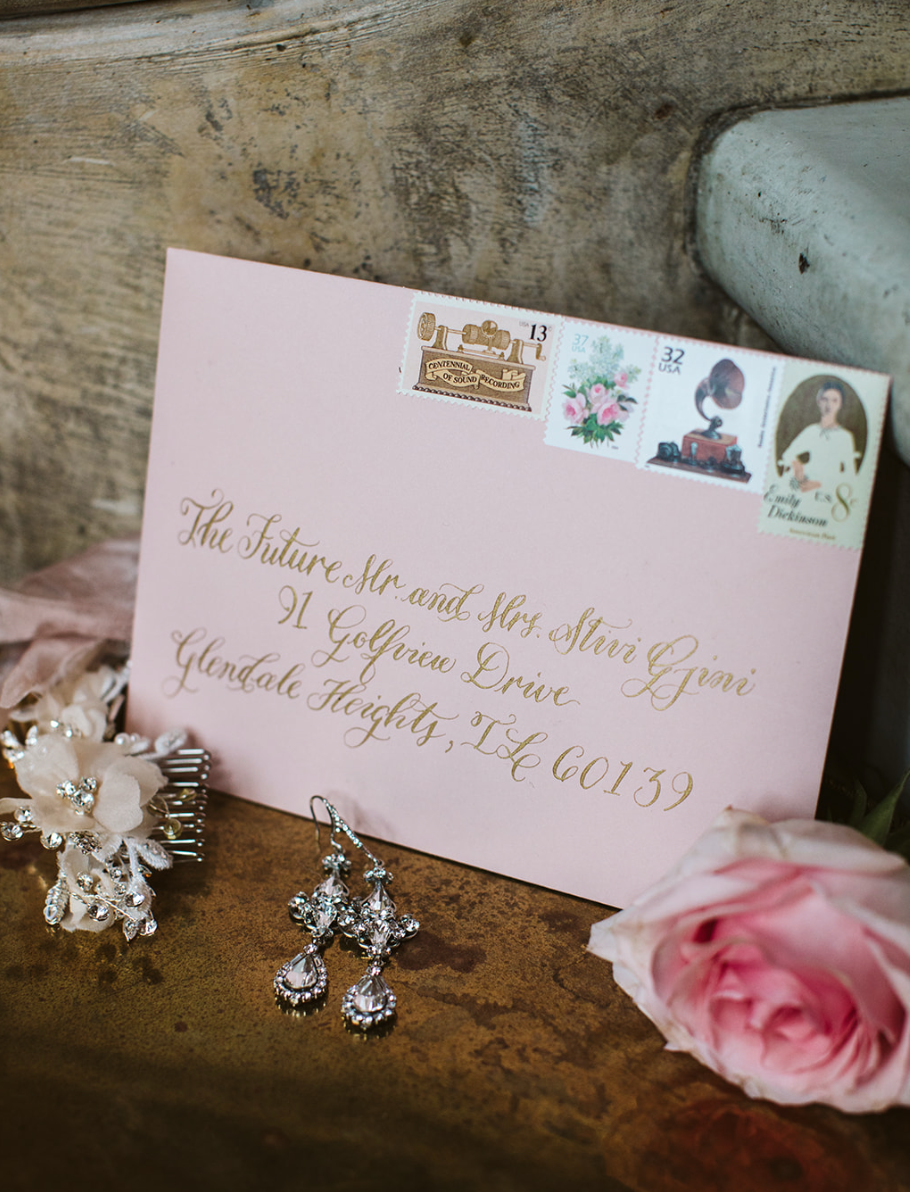
We want to make sure it is clear to the recipient who the invite is actually inviting. The easiest solution is clearly writing or printing out every guest who you expect to attend on the mailing envelope of the save the date and the invitation. This will provide clarity early on for the guests. If you are wanting to have an entire family/household attend including children, use wording such as "The Williard Family” or write out each name “ Mr. and Mrs. John Williard, Jonothan, Mary and Sarah”. If you would like just the adults to attend, use the wording “Mr. and Mrs. John Willard”. This implies they are the only ones expected to attend. For those with a plus one or a significant other who you would like to attend, write “Jonothan Willard and Guest” or if you know their partner’s name, go ahead and address it directly to the two of them.

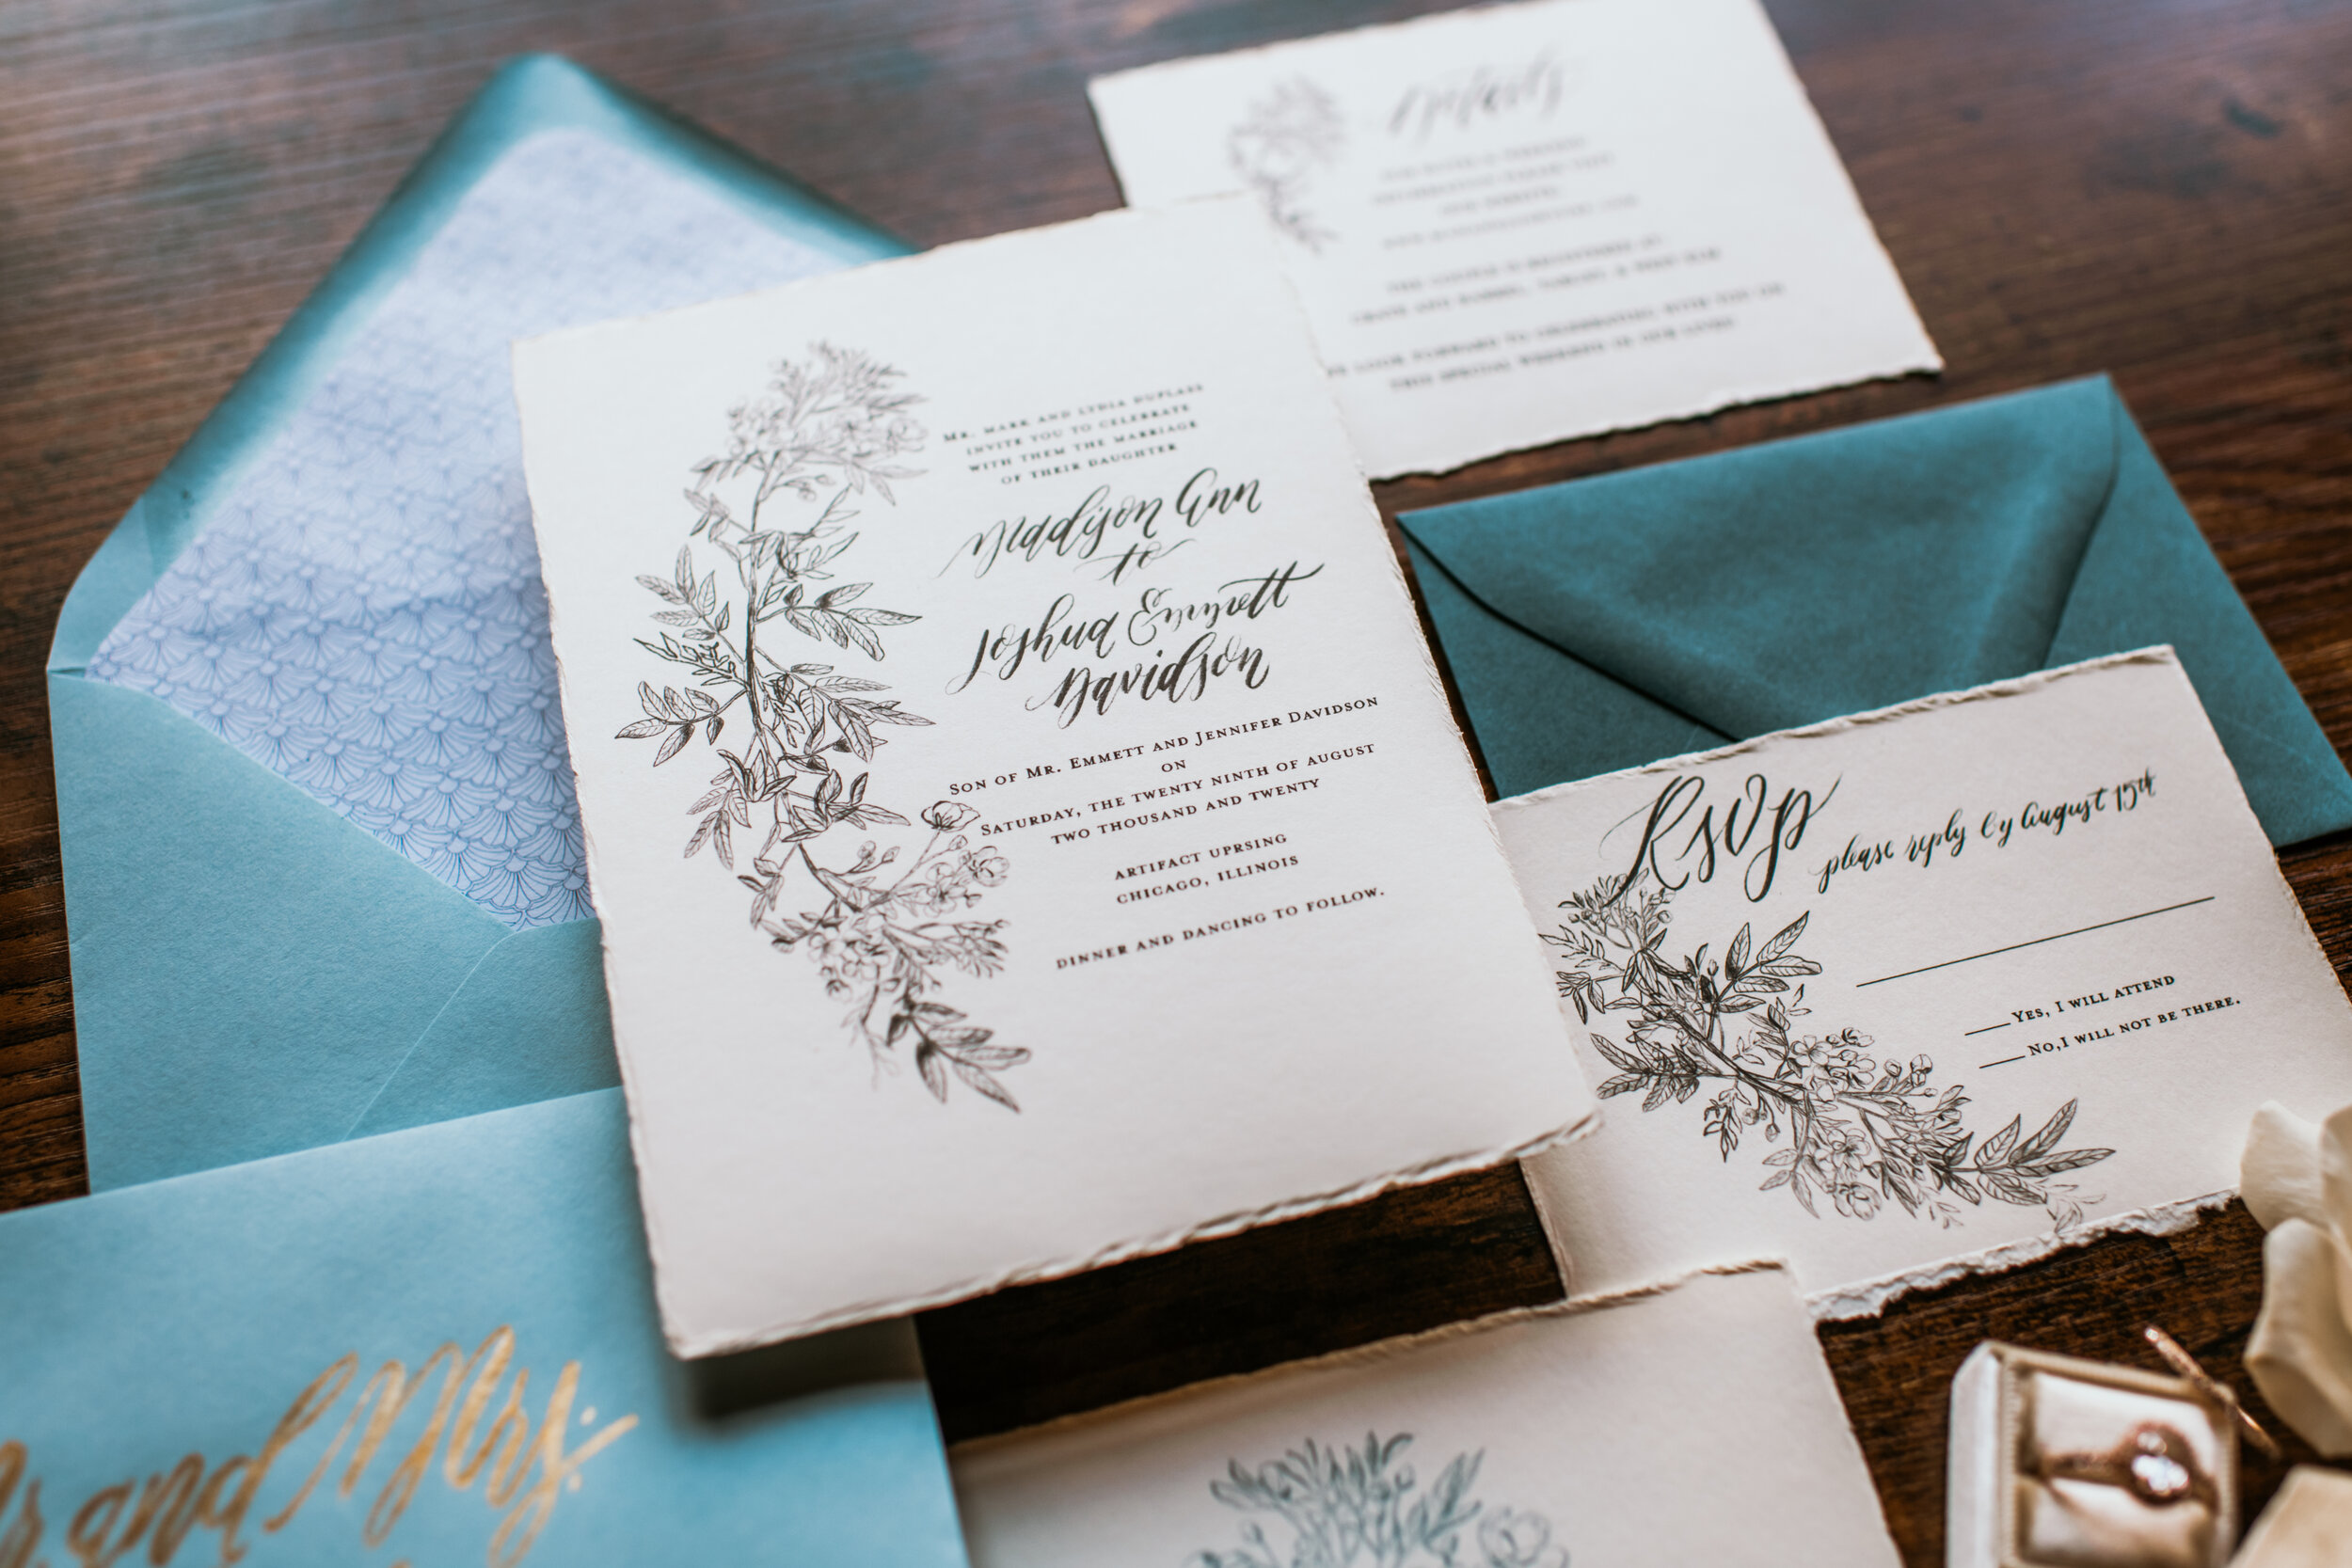
For formal weddings, you can use an inner envelope and again write out each name of the people you would like to attend. For those with a plus one, the address envelope should just state the guests name and the inner envelope is the correct space to add the words “and guest” for the parties with who you have given one.

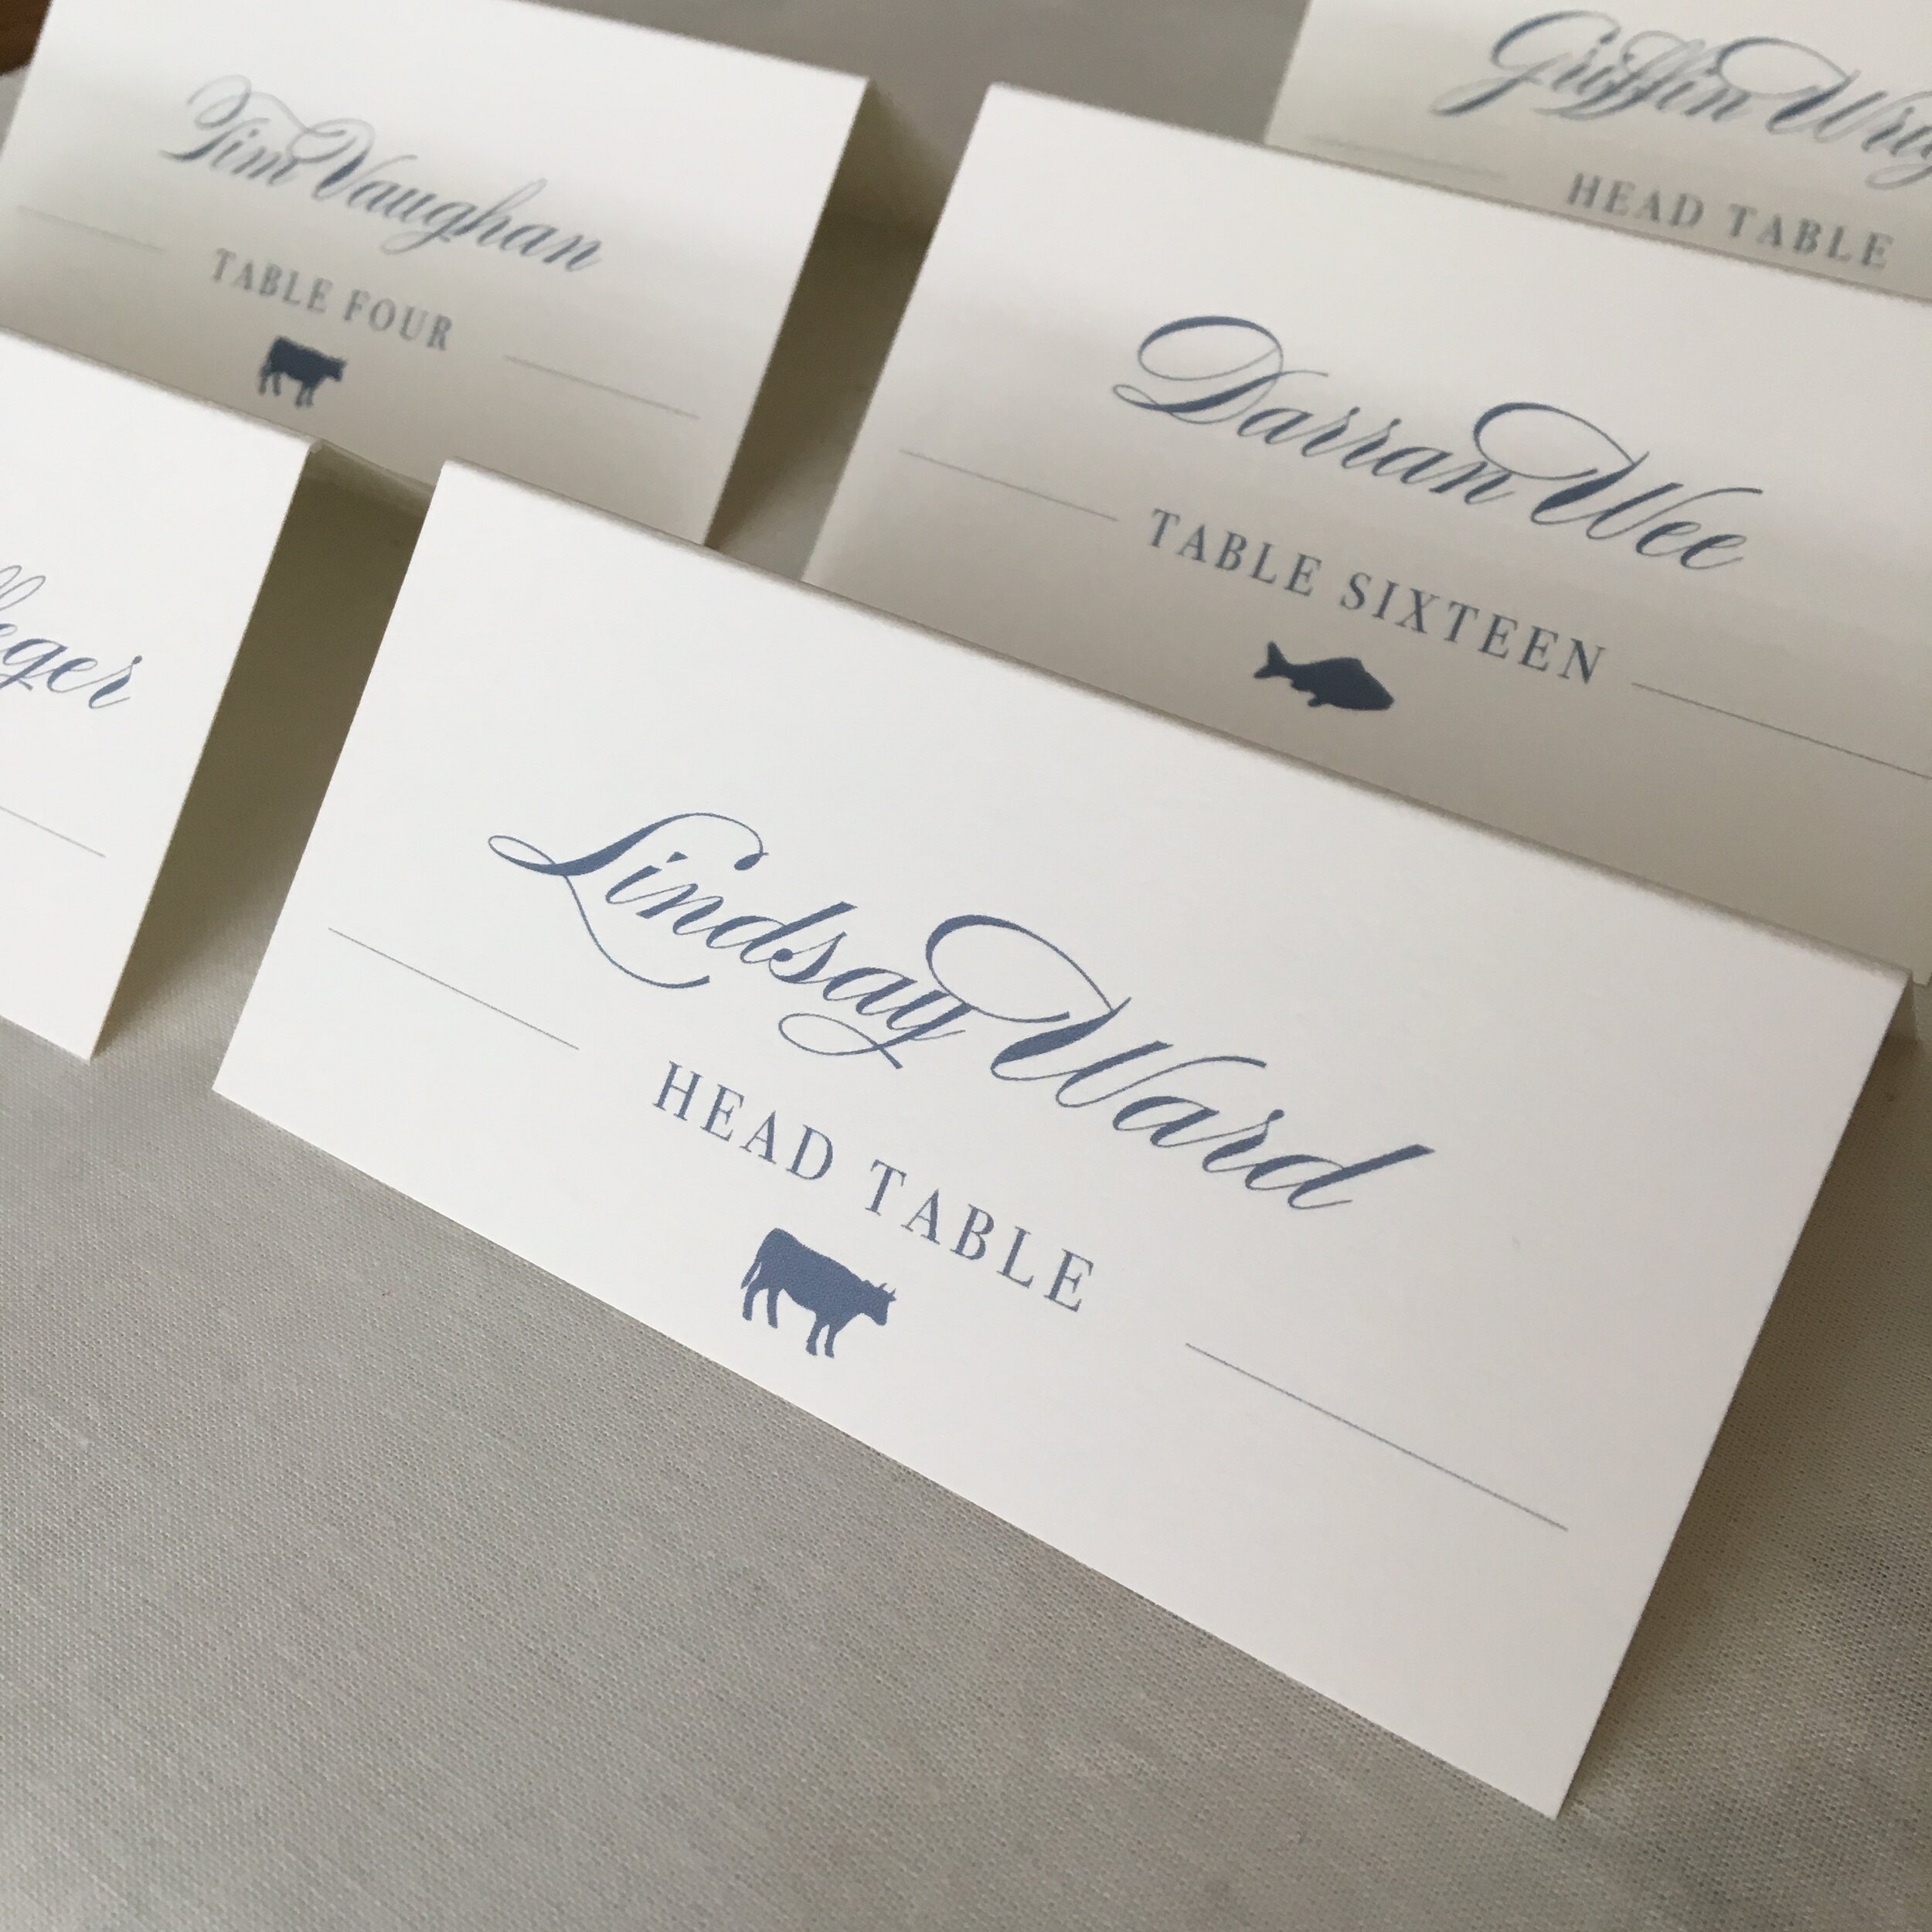
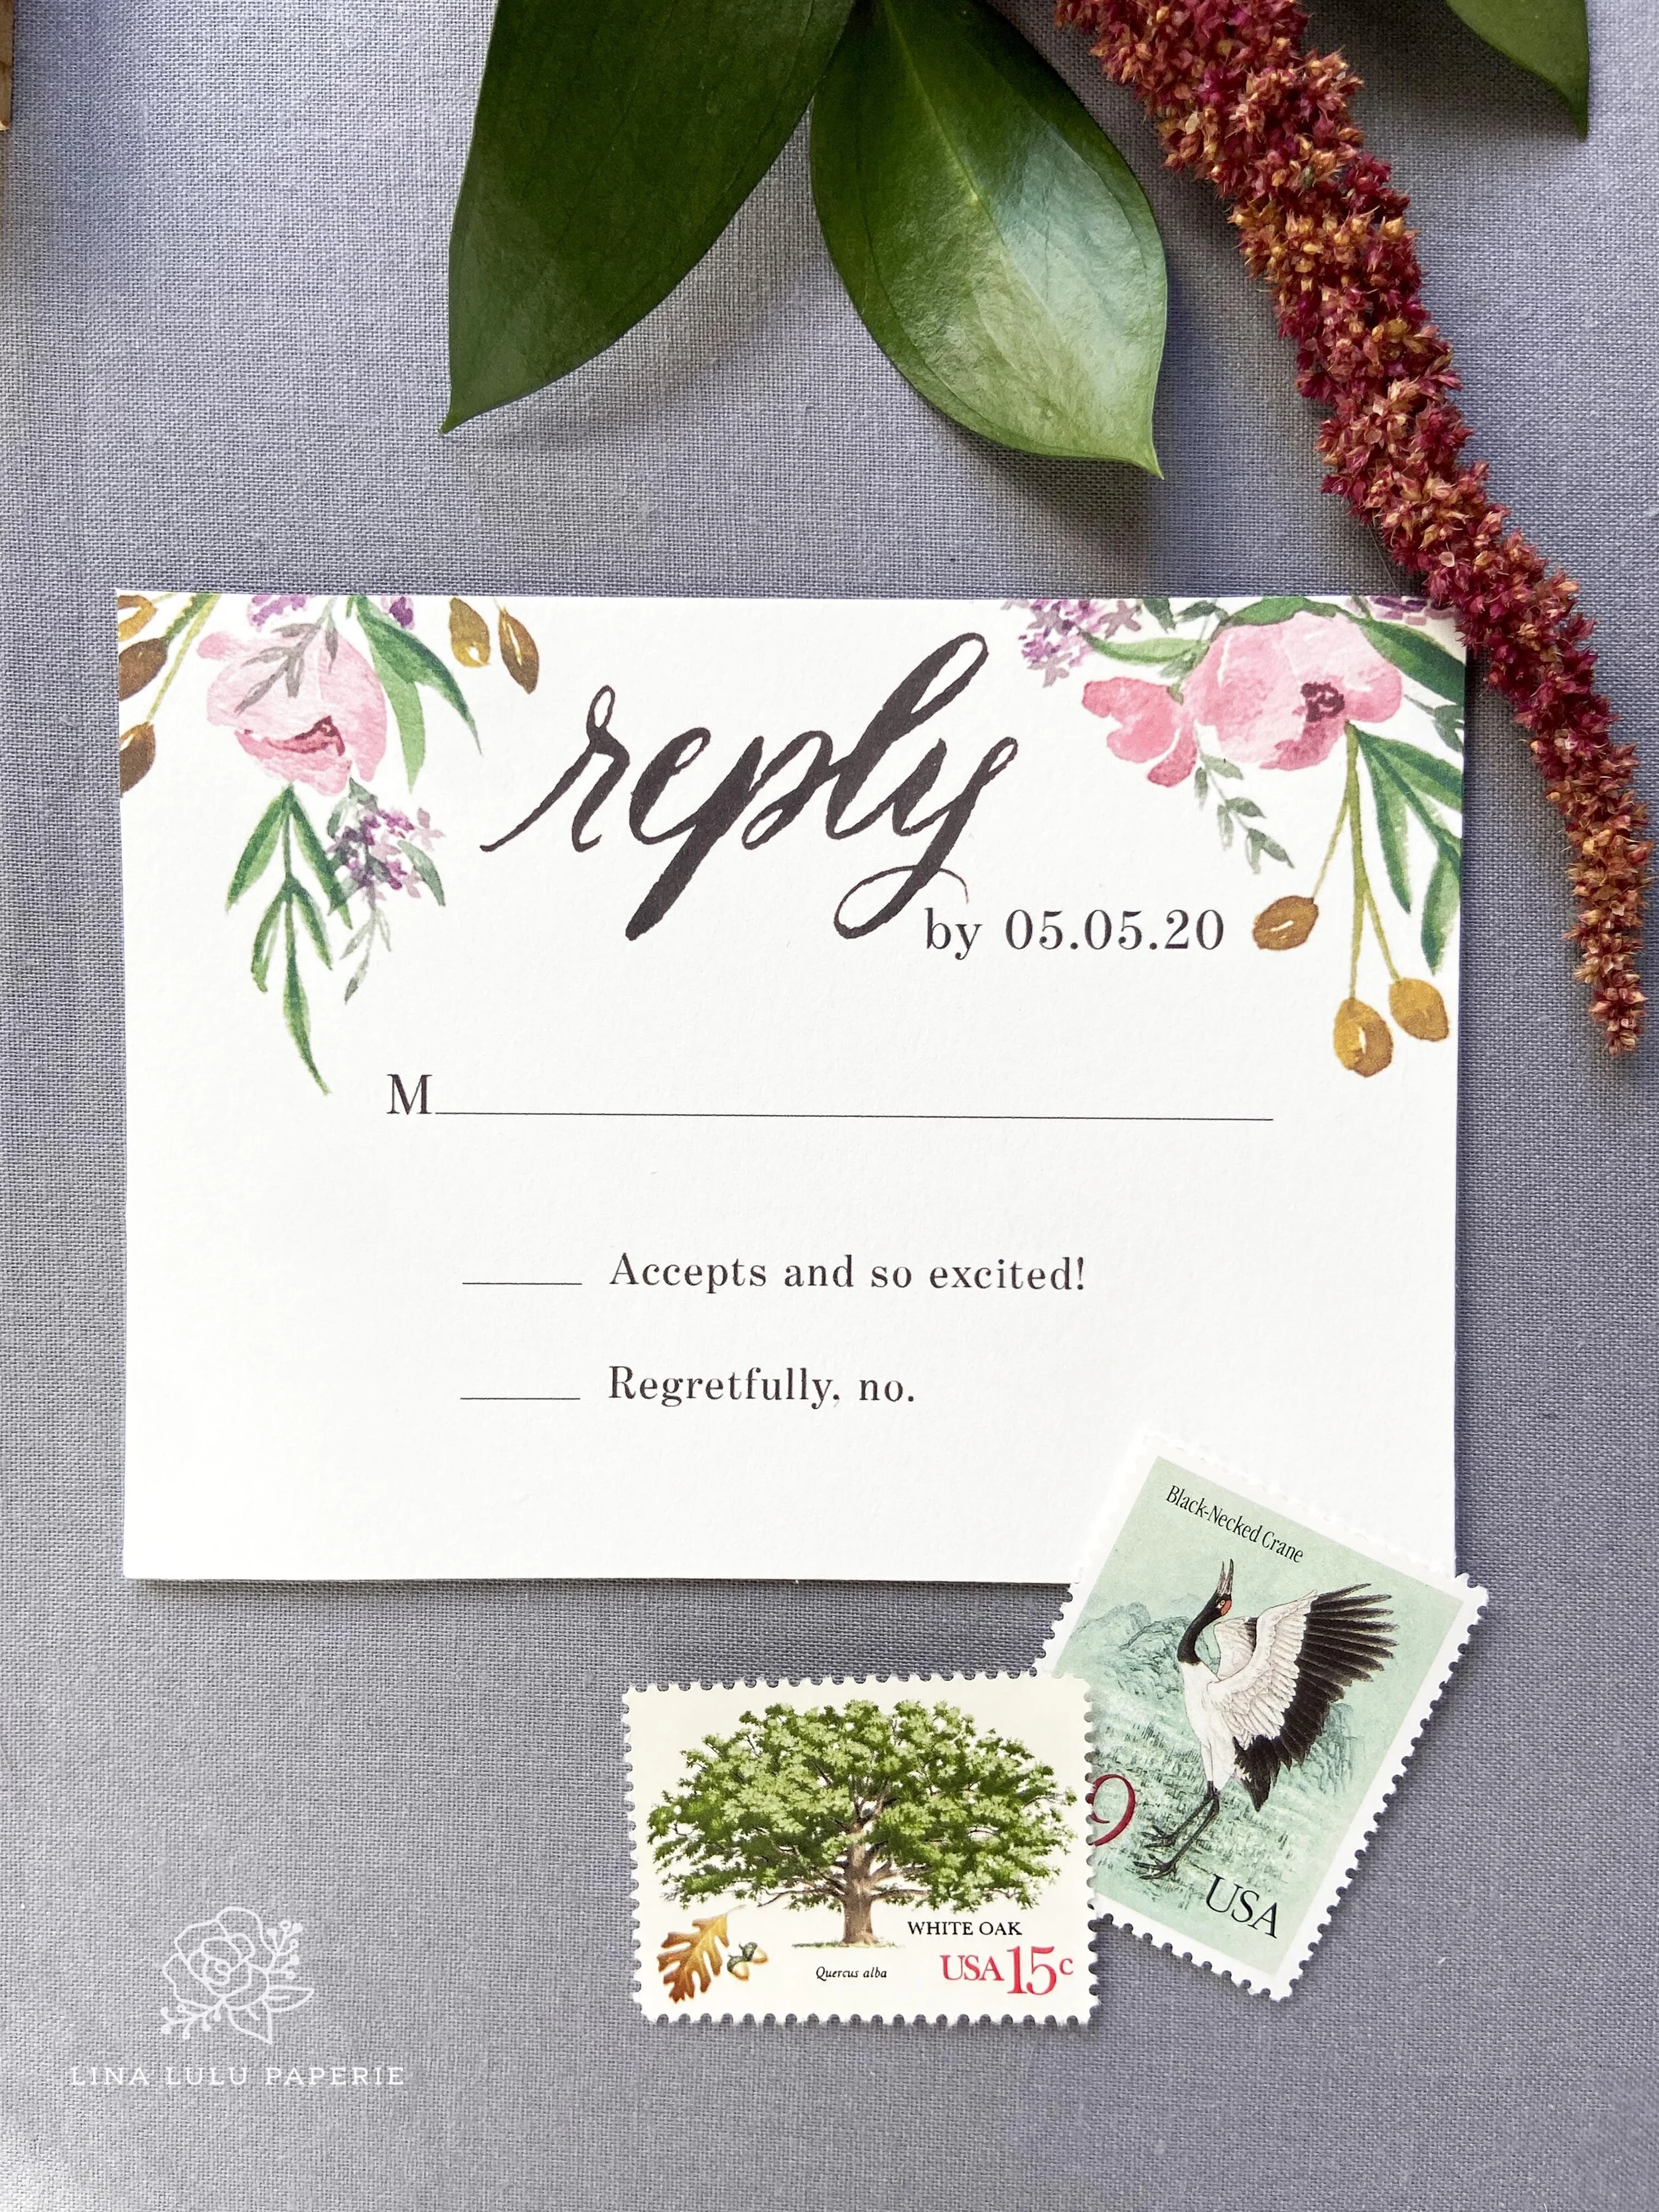
If you would like to go a step further, as talked about last week, you can fill in the number of guests or directly write the guest’s names on the RSVP card who you are expecting to attend.

2. Mistake: Sending out B-List Invites

This may be slightly controversial, but I know most couples have a B-list of guests. Whichever way you fall on this choice if you are to send out invites to anyone on your B-List make sure to print extra invitations and have the RSVP card have a later return date. This will ensure that those guests will have a resturn date that is later than when they receive their invitation. Remember, whoever receives a Save the Date should always receive an invitation, but those who receive an invite do not always have to have a save the date.

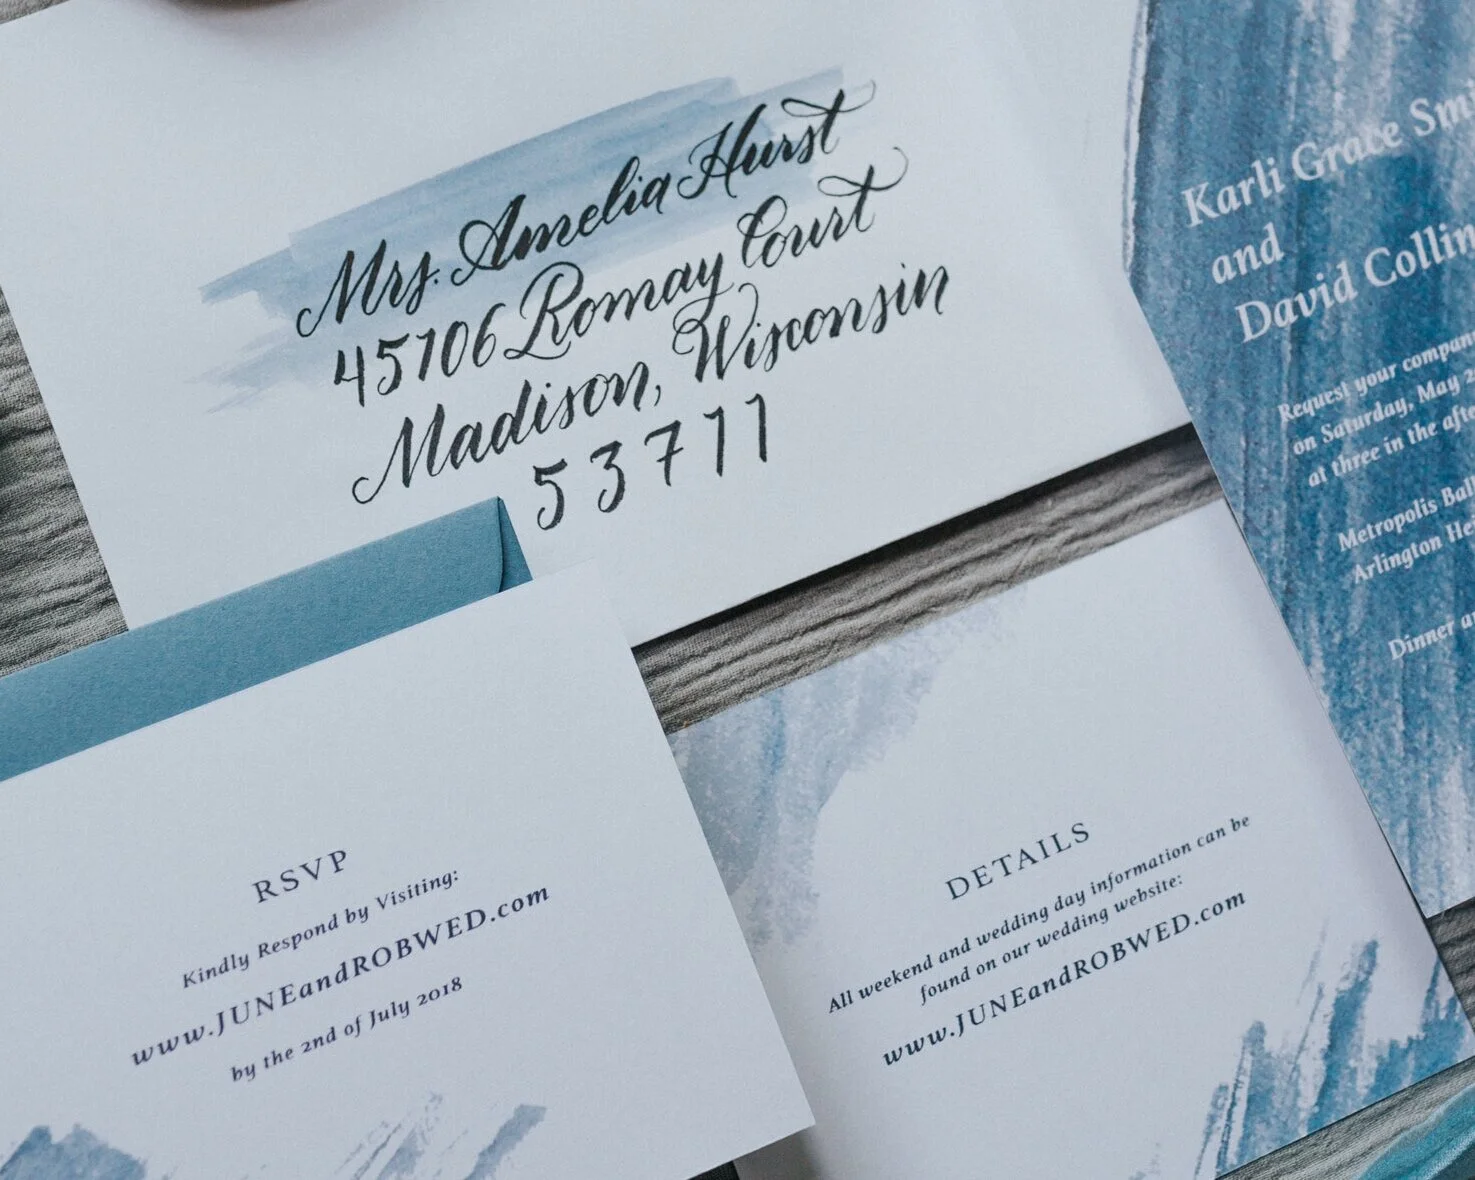
3. Mistake: Forgetting to put a stamp on the RSVP

To ensure that your RSVPs get back to you, don’t forget to address the return envelope to the correct person and stamp your RSVP envelope. This simple courtesy will cut out the extra step of guests needing to buy a stamp and will help your RSVP return to you in a timely manner.

In the case of an online RSVP, make sure directions are clear and web address is easily typed out.

Wise Wedding: Details and Insert Cards

In the last few weeks, I have talked through how important the invitation is, how to word the invitation but many people get tripped up on what to include WITH the invite suite. Today we are talking through the “extra” cards you include in an invitation suite to help your guests fill in the rest of the information gaps. These cards also keep the questions to you, your forever love, and your parents to a minimum—hooray!

WiseWedding_Details.jpg

The cards that most often get included in a suite are the RSVP card, a Details card and an accommodations insert. Let’s break down what is most important for each:

LinaLuluPaper_JImandLindsay.png
RSVP_LinaLuluPaper_SpringFlorals.jpg

The RSVP Card

This item is a separate card that guests mail back to you to let you know if they will be or will not be attending your wedding. These cards are traditionally a one-sided card with the RSVP date, a line to fill in the name of your guest, and a “yes” or “no” to circle or a check box to mark off. Other items that can appear on the card can include a meal choice or a spot to have guests write in a song for the DJ to play.

(Helpful tip: To avoid an uncomfortable conversation or unexpected guest, you can write the expected guests’ names on the RSVP before sending it out. This will help your guests know who is invited, especially guests with children of a certain age or a possible plus one. To make it clear for guests who can bring a date, you can pre-write the guest’s name and the wording “& Guest”, “and plus one”, or have a line for a number of guests and fill in the correct number for them on the RSVP to help them know if they truly have the option to invite a date. We will explore the wording of this in the upcoming Wise Wedding entries. )

RSVP cards are most often sent with an accompanying envelope addressed to the couple (or the person in charge of guest count) and a stamp. For more casual weddings, an RSVP postcard can be used as well. Remember to include a stamp with either choice for your guests.

If you are asking your guests to RSVP through your wedding website, you can still include an RSVP sized card with no envelope in the invite suite. This typically one sided card would contain the address and how-to directions to RSVP on your website. You can also add this information to the details card to cut costs.

Your RSVP date should be set 1 month prior to your wedding date. As discussed in Wise Wedding: Tackle Your Wedding Paper Goods Timeline, always check with your event space and caterer for when they need a final guest count.

LLPWildPoppy_WeddingRSVP.jpg

The Details Card

Your details card or insert is an additional card to include with your invite and RSVP card. This strictly informational card helps guests understand additional expectations or helps draw attention to anything about your wedding/weekend that they need to be aware of ahead of the day. Many couples now have a wedding website that addresses these concerns and contains the same information. The details card can include this website address, as well as the information you think your guests might miss if they don’t visit your website.

LLP_willowweddinginvite_calligraphy.jpg

Often these cards are sent with the invitation but can be sent ahead of the time with the Save the Date if important information is needed to conveyed sooner. Such information could be to book accommodations or flights ASAP for a destination wedding, if your wedding date is over a holiday, or is in the same city as a busy event such as Mardi Gras or the Super Bowl.

Other items to include on the details card(s) include:

  • If your reception is in a different location than your ceremony, formal etiquette says to leave the address and that information off your invite and place the reception address on the insert.

  • Wedding website address

  • Accommodations and if you have room block information such as a date to book by or a code provided by the hotel to give a discount to guests.

  • Transport information, such as shuttle busses to the wedding or airport location

  • Attire. Here you can let know guests to wear a “casual cocktail” or if you have a mostly grass location to advise them to wear sandals or flats, etc.

  • Parking or driving information if it is out of the norm or would be hard to find. This could include parking garage information for city locations, signs to look for, or special instructions for locations such as a friend’s house, national park, or more secluded location.

  • Special instructions for the venue, time of year, or whether instructions (such as if it rains where the ceremony will be held ).

  • Registry information. Though it is not traditional to include registry info with your invite, the details card would be the best location to do so.

Other items you can include in your details insert are special wedding weekend activities such as a welcome cocktail party, wedding brunch, or afternoon picnic. If not all guests are invited to these events, include them on different cards and insert them into your wedding invitation suite.

Make sure to include a heading on your card for guests to easily identify. This can be as simple as the words “Details” or something like “More information” or “We’d Like You to Know…”. If the card is more themed such as directions or weekend details, use those headings for guests to see.

LLP_Details_WeddingCard.jpg

Design of your Details Card

The fun thing about your details card is that since you are not fitting it into its own envelope, you can design it in a more “fun” style and shape. The only rule of thumb is to keep it smaller than the invite to give the invite precedents. You can have a half-circle, a folded card, or a two-sided, skinny card—it’s up to you! Allow the design to be functional, but compliment the vibe of your wedding and invitation suite.

Accommodation Cards

Not all weddings have multiple items for the guests to be aware of. One of the more important pieces of info to get to guests is the accommodations. This information can be on a separate card or the oppiste side of the details card if need be. This separate card can be helpful if you have multiple hotels at different price points or for destination weddings to include airports and rental car information.

LLP_Details_WiseWEDDING.jpg
MaggieCaleb_InviteSuite_LinaLuluPaperie.jpg

Website Cards

As discussed earlier, I’m seeing more couples are choosing to have a wedding website as a one-stop place for all things wedding weekend information for their guests. To help your guests know the address you have a few options:

  1. As previously mentioned, include it on a RSVP style card and have guests RSVP on your website.

  2. Include the address on the details card with wording such as “Find all wedding weekend information at www….” or “Please visit or wedding website for all information at www…” This is best for more traditional weddings where you use your details card to list only important information such as booking accommodations and reception address. You then can use your website to list such things as directions to the venue, registry information, and other items for your weekend on the website instead of the details insert.

  3. Include a separate wedding website insert card with just the website address for guests and wording such as “For more information, please visit: www….” This insert card would be the smallest of the insert cards included in your invitation suite.

The last item you can insert is a map for your guests. This is especially a fun detail for destination weddings or if the majority of guests are from out of town. I will discuss maps more in the upcoming weeks.

If you have any questions on insert cards or interested in me designing your wedding suite, contact me here!

Wise Wedding: The importance of Invitation Wording

Though many weddings these days walk the fine line of traditional and breaking “the rules”, one important category of rules to follow is what to include in your invitations, specifically the wording.

LinaLuluPaperie_Invitation_Woring_Guide

Many people choose to go traditional on the wording without considering the origin of the order of the invitation wording. Today, I will be breaking down the way an invite is written and common phrasing you can use.

LinaLuluPaperie_WeddingWording_Invite

The Host Line

The opening line of your invite is the space which indicates the host or hosts of the wedding. Traditionally, a bride parent’s would pay for the wedding and they would be considered the host of the wedding and party. Thus the common phrase for the host line would read:

“ Mr. and Mrs. Jam invites you to celebrate the wedding of their daughter…”

Now, in our modern times, many couples are opting to pay for their own wedding, or receiving financial contributions from one or multiple parents. Here are a few helpful tips to navigate your wording:

  • If you (the couple to be wed) are paying for your wedding, you do not have to include a host line.

  • The word “and” between two names traditionally implies the two people are married

    Very Formal: Mr. and Mrs. David Charles Jam…
    Formal: Mr. and Mrs. David Jam… OR Mr. and Mrs. David and Cheryl Jam…
    Casual: David and Cheryl Jam…

  • If your parents are divorced, keep both names on a separate line, with the mother’s name first. You still keep both names on separate lines, even if they are not remarried

  • If just one divorced parent is hosting, their name is included on the first line

  • If you are including a name of a step-parent, include it on the same line as their partner

    Not Remarried:
    Mrs. Cheryl Jam
    Mr. David Jam

    Remarried with Step-Parent(s)
    Mrs. Cheryl Jam Davis and Mr. Joseph Davis,
    Mr. David Jam

    Both Sets of Parents:

    Very Formal:
    Mr. and Mrs. David Charles Jam
    and Mr. and Mrs. Stephen Matthew Berd

    Formal:
    Mr. and Mrs. David Jam
    and Mr. and Mrs. Stephen Berd

    Casual:
    David and Cheryl Jam
    with Stephen and Jessica Berd

    ( Note: Different'-sex couples the bride’s parents are named first then the groom’s parents. In same-sex couples, the preference of who’s parent’s name is first is up to the couple or how it looks best with the design of the invite.

  • If all parents are financially contributing, place the bride’s parents first and then groom’s parents names

  • Names should not be listed in order of who is financially contributing more

  • Hosts who are not married should have names on separate lines

  • If you choose to include a deceased parent name, you will need to rearrange the wording as they can not actually serve as host. A common way to honor the deceased parent is to put it alongside the child’s name such as “ Marie Elizabeth Jam, Daughter of David Jam” or “ Marie Elizabeth Jam, Daughter of the late David Jam”

  • You can exclude the formal titles, i.e. Mr. or Mrs. for a more casual wording option

  • If the couple is paying with some assisitance from either parents or no assitance, use one of these common phrases:

The Couple is Paying:
with their parents:

Together with their families…
Together with our parents…

on their own:
With great joy…
With full hearts…
The honor of your prescence is requested at the wedding of…
<Name of couple> invite you to share in their joy…


The Request

After the host line, you include a request line. This line is asking your guests to join you at this joyous occasion, and set’s the tone for your wedding. This wording can range from super formal to casual. The tone can be conveyed in the style of wording you choose to go with. Such as:

  • The phrase “honor of your presence” notes a religious aspect to your ceremony.

  • The phrase “pleasure of your company” notes a non-religious ceremony.

  • For a more formal wording, you can use such words as honor, pleasure, or cordially, i.e. “…request the honor of your presence…” or “…cordially invite you to the wedding of…

  • For more casual wording, use phrases such as “love for you to join”, “joyfully request…”, “invite you to celebrate…” or “invite you you to join the celebration…”

  • For a very casual wedding, use phrases such as “would love your company…”, “join in the festivities…” or “want you to come party with …”


The Action

Now that you have established the host and formally asked your guest to join you, let them know what they are joing to celebrate, or more accuratly—who.

  • Traditinally this is the line where the parents of the bride ask the guest to join them “ at the marriage of their daughter…”

  • If both parents are hosting, the line would read, “ at the marriage of their children…”

  • If you as the couple are hosting, the phrasing may include “ as they say "‘I DO’; “as they join in the union of marriage…” or “as they celebrate their marriage…”


The Couples Name

The most important information on the invite might seem the easiest, but there are a few items to decide on.

  • For differnet-sex couples, the brides name is traditionally listed first. If her parents are hosting, her first and middle name can just be listed with out her maiden name followed by the grooms full name and then his parents names.

  • For same-sex couples, you can list the names by choice or alphabetically. If one set of parent’s is listed as the host, put their child’s name first.

  • Writting out full names are often regarded as formal. For a less formal feel, opt to only include fist and last name or first and middle names when parents names are listed as well.


The Date and Time

The date and time are staright forward, but just as the other portions of your invite, you mst decide how formal you would like to have it.

  • Traditionally, the date and time are fully written out, incuding the year

  • The day and month should be capatilized, and the year should be lower-case.

  • The time should be spelled out. If your time is on the half-hour, using “half-after” is more traditional. Using “half-past” or the word”thirty” after the time is the more casual version.

  • Evenings begin at five o’clock. You do not have to state “morning”, “afternoon” or “evening” unless it falls btween 8, 9 , or 10 as these could be morning ceremony times. You can state the time and then the pharse “in the evening…” but it is not necessary or traditional.

  • These rules can be broken in more contemporary designs.

Lina Lulu Paperie_Invite_InviteWording

The Location or Locations

This information of location follows the date and time on your invite.

  • For the ceremony, list the venue name on one line, and on a seperate following line include the city and state fully written out.

  • If you are having the ceremony and recption at the same place, use the phrase “ Reception to Follow” or “ Dinner and Drinks to follow” to let guests know on the followling line.


The Reception

  • If you are having the recepetion at a seperate location, let your guests know by only including the venue name and not the address on the invite on the line below the ceremony information. You can include a reception card with the additional information of address or any parking information.

  • This line can be used to again let your guests know the formality of the recption with phrases such as “Dinner, dancing and merriement to follow”, or “An evenign of celebration to follow”

  • If you are not serving a full meal, use this space to notify the guests: “Punch and cake to follow” “ A dessert reception to folllow” or “Drinks and dancing to come!”


The Dress Code

Some couples want a specific dress-code to be followed for their big day. If you are having a black-tie wedding, this must be included on the invite. For any other dress code, you can state it at the end of the invite after the reception line.
You can also include a note on the details card of your invite suite or on your wedding website. If you do not state a dress code, guests will pick up clues from the invite through look and wording on how formal a wedding will be.


Like with any part of your wedding, choose the wording on yor invite that works with your personalities and you style of your day!

Wise Wedding: What is an Invitation Suite?

Have you heard the term “invitation suite” and had no idea what it meant? You are not alone! There are a handful of terms that can sound the same or confuse you when talking with a wedding industry expert. I've compiled a helpful guide outlining these terms and what exactly an invitation suite contains.

LinaLuluPaperie_WiseWedding_Invitation_Suite

Why call it a suite?

The term “suite” refers to a set or a number of things forming a series. Thus your invitation suite is the set of paper items letting your guests know the information for your big day. It should always include the invite and an RSVP card, as well as a card for important information like directions and accommodations.

LLP_wedding_suite_photo_2020_version02.jpg

The basic wedding invitation suite consists of:

1. Your invitation—which is the largest piece–includes the key information of your name’s, wedding date and time, venue, and can include the ceremony venue address without a zip code.

2. The outer mailing envelope is the largest envelope and is addressed in the style of your choosing—printed or hand calligraphy—to your guests. These can be white or for a more fun touch a color or metallic of your choice.

3. The details card includes reception venue name, address, reception start time, and accommodations info such as where you have hotel room blocks. You may also include your website at the bottom of this card or registry information. 

A second card (that you may or may not need) can be included with such information as directions, travel arrangements, or other pertinent information for guests. ( See optional items to include below)*

4. The RSVP card is a smaller card to allow guests to write their name(s) and let you know if they are attending. You may also include a space for meal choice, song requests, or website information.

5. The RSVP envelope is the smallest envelope and should always include an address that goes back to you or the coordinator of the guestlist. (Don’t forget to place a stamp on this so your guests can easily drop them back in the mail to you.)

LinaLululPaperie_WeddingSuite_Floral_Blue_Vintage

Other items you can include in your invitation suite*

Inner Envelope

An inner envelope can be used to tell guests who is (and is not) invited to your big day. The envelope is slightly smaller than the mailing envelope and holds the invitation suite inside. This is traditionally used in more formal weddings but allows you to clearly state who you are expecting to show up. Examples include your Guests’ names and noting if they have a plus one (i.e. Mr. Robert Smith & Guest). This is also the place to indicate whether or not children are invited by just writing the parent’s names.

LinaLuluPaperie_watercolor_Invitation_suite

Weekend Details Card

If you have multiple events going on during your wedding weekend, such as a brunch, welcome drinks, after party, etc. include a weekend details card. You want to have your guest know what to expect as well as what to pack appropriately for all the different social events.

LinaLuluPaperie_Vellum_Wrap_Ribbon

Invitation Wrapper

An invitation wrapper is not necessary but is a beautiful and practical addition to your suite. This “wrapper” can be twine, ribbon (Seen in the picture on the left), a belly band, a folder, or even a layer of vellum wrapped around the invite. It is a beautiful accent to keep all the contents of your invite safely together when being mailed.

Website Card

You can include your wedding website on your details card or include a smaller card with just the web address. If you choose to have a website, which is a helpful resource for your guests, include as much information and details of your weekend/wedding there. This will cut down on how many text and phone calls you and your parents will receive from loved ones about your big day.

Envelope Liner

An envelope liner is a beautiful insert to your mailing envelope that allows you to add an additional splash of color, pattern, or shimmer to your invitations. It is also a fun surprise for your guests. It adds additional weight and quality to your overall invite.

Directions/Maps

Including an insert for directions or a map is great for a destination wedding or if you have multiple events happening in the weekend and need an easy guide for your guests. These can be done simply or more elaborate with watercolor features and illustrations. These beautiful pieces are not only functional but can be a keep-sake of your wedding to be framed.

LinaLuluPaperie_WaxSeals_Gold_BlueInvite

Wax Seal

A popular but beautiful new trend includes the wax seal (Pictured below). These small but impactful pieces are a fun and elegant way to add color, texture, or even your monogram to your envelopes or invitation. They can be used on an invitation wrap, on the inner envelope, or on the outer envelope. If you use them on the outer envelope, know that the suite then must be hand canceled by the post office as they are not always read by the modern machines.

Postage Stamps

One thing your should not overlook is your postage stamp. This small item can make or break the mood of the front of your envelope, choose wisely! There are a handful of beautiful options from the USPS. As well, you can choose vintage stamps totaling the right price for a layered look that will stand out in your guest’s mailboxes.


Photo by Jason Adrian Photo

Photo by Jason Adrian Photo

LinaLuluPaperie_Clementine_WeddingInvites_Suite

You can include as many of these items as you see fit and are helpful for your wedding weekend. Just remember, the two most important items are the invite and RSVP, then build your suite from there! Next week, I will be talking about the importance of invitation wording.

As always, if you have a question-feel free to message me!

Wise Wedding: Let's Talk Save the Dates

You most likely have in recent years either received a variety of Save the Dates or have walked into friends home and noticed the cluster of Save the Dates hanging on the refrigerator. They come in all forms, from beautiful thick cards with gold foil, to lovely photos of the happy couple, to simple magnets to remind the guest of the upcoming nuptials. They are all great options, all worthy of being hung in a prominent place of honor —but which one is best for you?

Since engagement season is now upon us (there is something about those fall leaves and cozy holiday vibes, am I right?) Save the Date season is not far behind. Since many couples plan their wedding to be the following year—and most in the months between April-September—plan to send or receive Save the Dates in the 6 to 9-month mark before your wedding. Usually, you will see an influx of these pretty things around January & February.

WiseWedding_SavetheDate.jpg

What is a Save the Date?

A save the date is a card that notifies your guests to reserve or “saves the date” of your wedding. This is important to not only make sure all those you love are able to make the date but allow people ample time to schedule travel arrangements. I also like to remind people this is the first piece that people will receive giving them the first impression of your wedding and who you are as a couple. It can be a stand-alone design or you can sprinkle in pieces of your future invite design. Either way these should be fun and show off you and your forever love how YOU see best.

LinaLuluPaperie_SavetheDate_Photo2020.jpg

What Information is actually needed?

Four things not to forget to include are:

  1. You and your forever loves names: Make sure to include both your first and last names somewhere on your Save the Date. You may be sending these to family friends that don’t recognize just your face or first name.

  2. Your wedding date(s): Some weddings are more than one day. If all guests are invited to multiple events on the wedding weekend, include those dates for them to know ahead of receiving the invite.

  3. Your location or city of the wedding: You may not know the venue quite yet, but have a date and city picked out and want to let people know sooner rather than later. This is important especially if you plan to have a destination wedding. Including the destination also allows people to know what type of travel accommodations they should be booking such as flights, hotels, rental cars, etc.

  4. A wedding website: Many couples like to include a wedding website to help people have quick access to information such as hotels, registry, and any other wedding weekend events they may be invited too. This space is great for putting commonly asked questions and cuts down on the questions you and family members may receive throughout the planning process. Even if you don’t have everything on the website when you send out the Save the Dates, I advise to include it to allow people to get familiar with the address for future reference. You may also want to include special travel accommodations such as the best airport, if they will need to book a car or any other information you may find helpful for guests as they plan to make arrangements.

When do I actually send them out?

Many recommend sending out your Save the Dates around the 6-9 month mark before your wedding. If you know you are having a destination wedding outside of the city you live in or that the majority of your guest will be traveling to your wedding, the earlier you should send out your cards. If your destination* wedding is requiring everyone to travel internationally, it’s best to send your Save the Dates around 1 year prior, if possible.

*As noted above, if you just know the location country and date, this information is better than the information given too late for guests to make appropriate arrangements to travel.

TheClyde-Fall2020-14.jpg

Do I have to send it to everyone I plan on inviting?

Yes. You should plan on sending a Save the Date to everyone you plan to invite, even if they are super involved in the planning (like your parents or best friend) or you know they are planning on not attending. By making your guest list early in preparation for sending your Save the Dates, you essentially have created a master list of addresses that you then can use for sending out invitations and track who has replied (hooray!) later on in the planning process.

Everyone who receives a Save the Date should receive an invitation, but you can send an invite to a guest who did not receive a Save the Date. (Sometimes you have a last-minute invite and not sending them a Save the Date is not the end of the world.)

A simple etiquette rule to follow is any guest over 18 years, even if they live in the same house as another guest ( such as their parents) should receive their own Save the Date and definitely their own invite. If you choose to cut down on how many Save the Dates to send, make sure all names of those are to be invited are written out on the envelope to not create any confusion early-on on the families part.

JandM_Savethedate.jpg

Choosing the Right Design

Remember that fridge with all those Save the Dates? I bet you do, thus you know that there are hundreds of designs and choices to choose from. The main two designs you should decide between is a Photo Card vs a Type Driven card. Which one is better?

LinaLuluPaperie_STD_Photo_WebsiteMockUp.jpg

Why would I choose a Photo Card?

As I noted above, your Save the Date is the first impression for many of your loved ones about who you and your partner are as a couple. Many couples are excited to take engagement photos and a photo Save the Date card is the perfect place to use them! They will introduce and showcase your gorgeous faces as well as deliver important information to your guests.

2020-02-27+15.00.52.jpg

Why would I choose a Type Driven card?

First, when I say type-driven I mean no photos of you anywhere on the card. This style though could include a beautiful illustration or calligraphy elements that become the main focal point. I personally love this style as it does two amazing things: First, your Save the Date is the first introduction to not only you but also the feel of your event. You have been carefully choosing colors, textures, and the feel of your wedding. Since guests will have this piece of paper pinned up somewhere for the longest period of any other item, why not showcase some of what is to come? Secondly, you can infuse your personality into the card through fun phrases such as “Let’s get us to the Chaple on time!” or “Let’s celebrate, save our date!” as well as fun illustrations of the venue, landscape, your beloved animal, or even some inside joke. It’s your Save the Date, why not tailor it to be fully unique to you?

Budget-friendly options for you to still send out Save the Dates

If you have not gathered by now, there are a few great reasons to send out your Save the Dates. I understand though that people often will ask if they have to or for budget-friendly options. Here are a few tips to keep costs low for your first impressions:

  1. No fancy printing. It could be tempting to add gold foil or embossment on your Save the Dates, but it isn’t necessary. Since both these printing styles require an extra step, that extra step includes an extra charge. If this element is still something you really would like for your Save the Dates, picking the traditional “Save the Date” phrase can cut down the cost as it will not need to be created.

  2. No fancy add on’s. Since most people will be pinning this up on a board or fridge, you don’t have to add any extra items to create extra costs such as wax seals, ribbons, etc. Choosing a standard size, such as a 5” x 7” can keep postage cost minimal.

  3. No extra calligraphy. I will always advocate for calligraphy, but on a Save the Date going with digital printing will be just as beautiful and will be another cost-saver in the long run.

If you are looking for a unique Save the Date, I can create a custom design for you, just click here. If you have any further questions about Save the Dates, feel free to contact me here.

Next up, I’ll be talking all about the timeline of invitations and the importance of prepping in advance.

Wise Wedding: Tackle Your Wedding Paper Goods timeline

There are many moving parts when it comes to planning a wedding. When I was planning my wedding (way back in 2012) Pinterest was just emerging, “breaking” traditional rules was just beginning to happen and I really didn’t know where to begin. Looking back, the process could have been a lot smoother if I knew what to expect and had a timeline to help me understand where to start, especially with my paper goods.

Over the upcoming weeks, I will be going into detail about all things paper, stationery, and calligraphy that you could use for your wedding, reception, and other events celebrating your big day—introducing Wise Wedding!

In this new series I will help you understand the important timelines, different paper goods, and how each could enhance your big day. These posts will contain bite-size information and go-to’s to clarify overlooked or often misunderstood items that not only add to your wedding but will help you understand the best options for your own big day!

WiseWedding_Introduction.jpg

Society for Creative Founders: Spring 2018 recap

At this very moment 27 women are gathered in Pensacola, Florida in a beautiful oceanside home building into themselves, their businesses and creating strong foundations for their passions to continue to grow and support them through their creative business. I was one of those women just 6 months ago during the Society for Creative Founders Spring 2018 conference. The impact it has had and continues to have on me and my business has been huge!

Building a creative business is exhausting both mentally and physically. It is often lonely and isolating working at home, out of the library and coffee shops. It feels like most people think I am just pursuing a fancy hobby and don’t quite understand what I am actually doing, why it matters and the hard work and hours that go into it.

When I finally said “Yes!” to going to The Creative Founders Conference after many conversations with Kristin, the owner and leader, as well as my husband—I said yes to not only pouring into my business but pouring into myself. I was incredibly nervous to go to a house for three days with women I didn’t know, in a town I had never been to, to learn and grow a business I sometimes questioned why I was still pursuing.

Leaving The Creative Founders Conference renewed in me a sense of purpose, equipped me with a community and resources I use weekly (if not daily), and continues to be a marker of growth in this crazy adventure of being a business owner. Here are a few take aways of why this conference was so impactful for me:

unnamed-3.jpg

Community is key.

Walking into the The Lee House that first afternoon I was nervous and intimidated to meet all these talented ladies. Stepping into the lobby I was instantly relieved because I could feel it in everyone—we were all nervous and intimidated because we didn't know how the next three days would go! Despite where we were at in our personal businesses, we all started with fresh slates for the conference. As the hours went on and we got to know one another, connections were created and joy was a top emotion in every session and meal. It was so refreshing to be around others who understood my daily feelings about what I was doing and why I was doing it and had the same doubts and worries I battled. Though we have physically been removed from one another since the conference, the community of these women is very real and authentic. We continue to connect with one another through social media, video chats and emails. This alone was worth going to the conference!

Spring+Creative+Founders+Conference,+Day+3+Recap.jpeg

Growing and learning is necessary and you shouldn't do it alone.

With such a solid group of ladies around, you will be immersed in the 6 pillars (Your Core, Your Client, Your Brand, Your Marketing, Your Money, Your Plan) of SCF with incredible speakers (who I will add sat in the session with us as peers when not teaching) who go in depth about their topic and how to apply it to your business. Like most creative entrepreneurs, I taught myself almost everything about business/being an entrepreneur I know through countless webinars, books and mostly Google. I felt the most important part of this conference was getting to learn side by side with the other women in the room. Could I have done these same topics through a book or webinar? Of course—but the benefit of sitting in a room full of others walking the same road during each session and personally hearing and learning from all the different perspectives increased the experience tenfold. With the resources of new business friends, I also left with a workbook full of notes I refer to weekly, and information that has impacted my business acumen greatly.

Taking advantage of the abundance of knowledge.

I often find personally I don’t know what to ask at conferences or classes when the question time comes around because I am still processing the information I just heard. Many of my questions come to me after the session is well and done. The sessions were chalk full of so much amazing information but what I found was different from other conferences was the speakers and my new friends genuinely were open to answering questions during after the session time or topic was “finished”. I never felt like I was burdening them when I would ask my questions and they always answered them with genuine, honest and full answers. Even now, as a part of the SCF online community, I know I can reach out and ask questions or bounce ideas off these friends and get thought out and encouraging answers.

Society+for+Creative+Founders+2018+Conference+Images+-+by+Anna+Filly+Photography_0734.jpg

You will be surrounded in beauty and resources.

Kristin, the owner and leader of SCF, is a former event planner and current wedding invitation designer. With that in mind she did an incredible job from start to finish creating a relaxing but stimulating atmosphere in every environment we were in. From the moment we walked in the conference room the delights and surprises kept coming from each session to each session. My little designer heart was so full with the well coordinated details and the excellent use of branding! We were spoiled with goodies of all shapes and sizes. It is a true testament to the power of the SCF community wanting to build one another up and cheer each other on as we all left with suitcases overflowing with products donated from alumni who have growing businesses touched by the teachings of SCF and conference sponsors who desired to see us have the best products possible. It was a sweet reminder that there is so much room for each of us to spread our magic in the creative world.

I+am+a+Creative+Founder+Print+at+the+Society+for+Creative+Founders+Conference.jpeg

Being apart of The Society of Creative Founders and attending the Creative Founders Conference has been a key growth mark in my business and has helped me focus more on the areas I need to grow in. I left with a sense of direction, accountability partners, and friends that I love cheering on as we build our businesses side by side through the unity of being Creative Founders.

Interested in seeing more of my time at the conference? Check of the conference recap for Day 1, Day 2 and Day 3. Learn more about the 2019 conference here! Plus follow along this week as they go through round two at the Fall conference on Instagram!